This guide shows admins how to create and activate a Generic Leave Policy in altHR — the policy type used for any leave besides Annual Leave.
TABLE OF CONTENTS
- Overview
- Prerequisites
- Steps
- Verify It Worked
- Common Issues
- Related Articles
Overview
Generic Leave Policies are used for any leave type other than Annual Leave — for example Hospitalisation Leave, Sick Leave, Maternity/Paternity Leave, Marriage Leave, Compassionate Leave, and Unpaid Leave.
Generic Leave Policies support customisable features such as:
- Pay Type — Full Paid, Half Paid, or Unpaid
- Refresh Frequency — Monthly, per transaction, or yearly
- Special Leave grouping — multiple Generic Leave policies can be grouped under one Special Leave, sharing a combined entitlement
Note: Setting up Leave Policies is one step within the broader Leaves Module setup, which also includes setting up the People module, Approval Routings, Work Days, Holidays, Leave Balances, and Leave Request Limits. This article covers Leave Policy setup only.
Prerequisites
Before creating a Generic Leave Policy, make sure:
- You have Admin access to altHR
- The People module setup is complete
- Approval Routings are configured (or you plan to use the default routing)
Steps
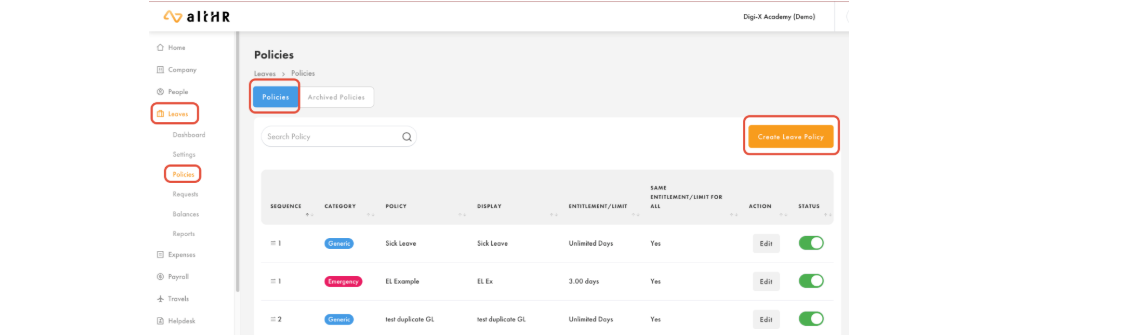
1. Navigate to Leave Policies
Go to Leaves > Policies from the left panel, then click Create Leave Policy.
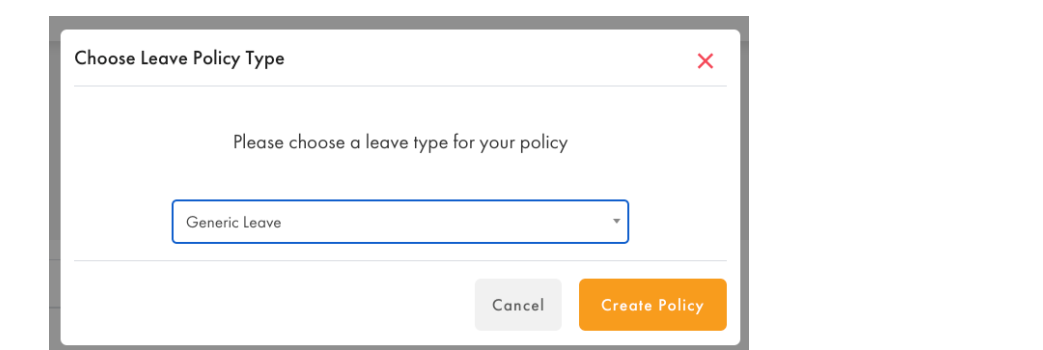
2. Choose the Leave Policy Type
In the Choose Leave Policy Type pop-up, select Generic Leave from the dropdown, then click Create Policy.
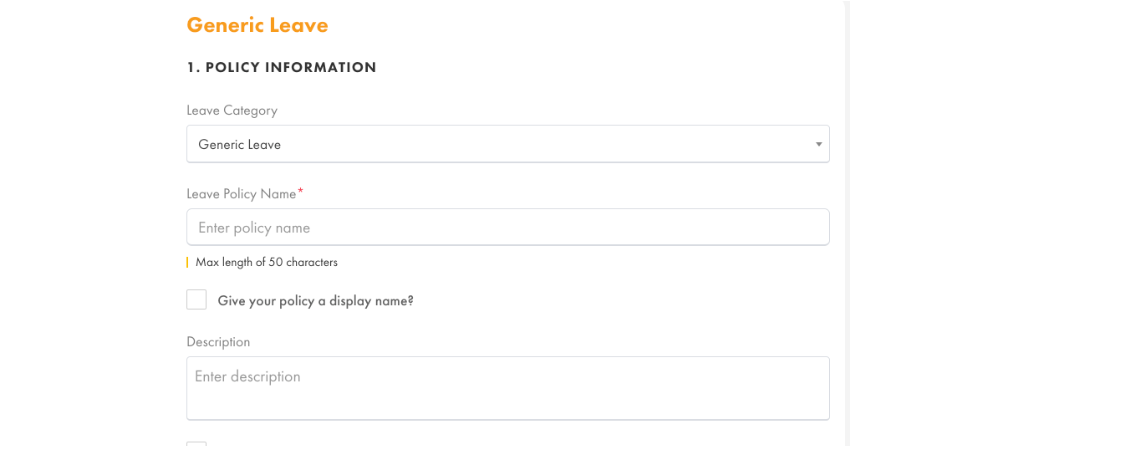
3. Fill in Policy Information (Section 1)
- Leave Category: Confirm it's set to Generic Leave
- Leave Policy Name: For internal reference (e.g. "Sick Leave for Contract Staff"). Max 50 characters
- Display Name (optional): Tick Give your policy a display name? to set what employees will see (e.g. "Sick Leave")
- Description (optional): Tick the relevant box if you want employees to provide attachments or a description when applying
4. Set Eligibility (Section 2)
Decide who can apply for this leave policy:
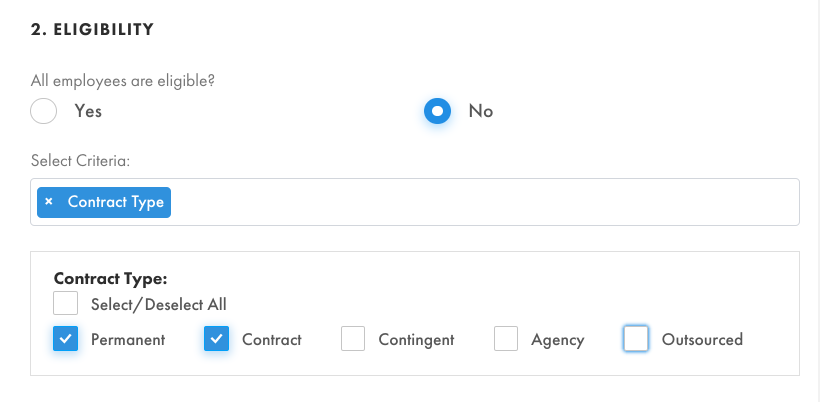
- Select Yes if all employees are eligible
- Select No to restrict eligibility to specific criteria (e.g. Contract Type, Gender, Location). For example, to make a policy available only to contract staff, select Contract Type as the criteria and check only Contract — this leave will then only appear in the app for employees tagged as Contract
5. Set Entitlement or Limit (Section 3)
Decide how this leave policy works:
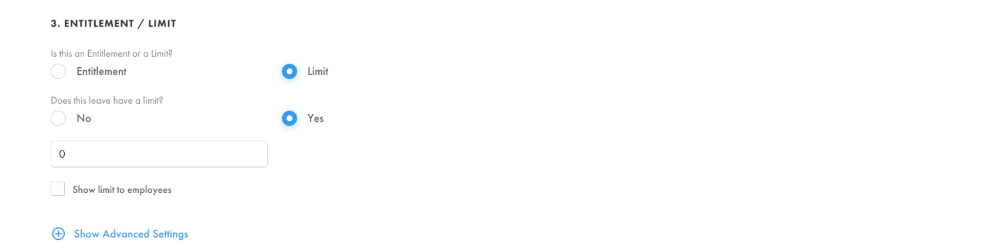
- Entitlement — employees are given a set number of days they can choose to use
- Limit — employees aren't automatically entitled to leave, but can apply up to a set cap
- If Entitlement is selected, enter the Default Entitlement (Days). You can also tick Add to Special Leave to make this policy selectable when creating a Special Leave (this action is not reversible)
- If Limit is selected, choose whether the leave is unlimited or capped, set the limit if needed, and optionally allow employees to see the limit in their Leaves Module
5.1 Advanced Settings
Click Show Advanced Settings to configure:
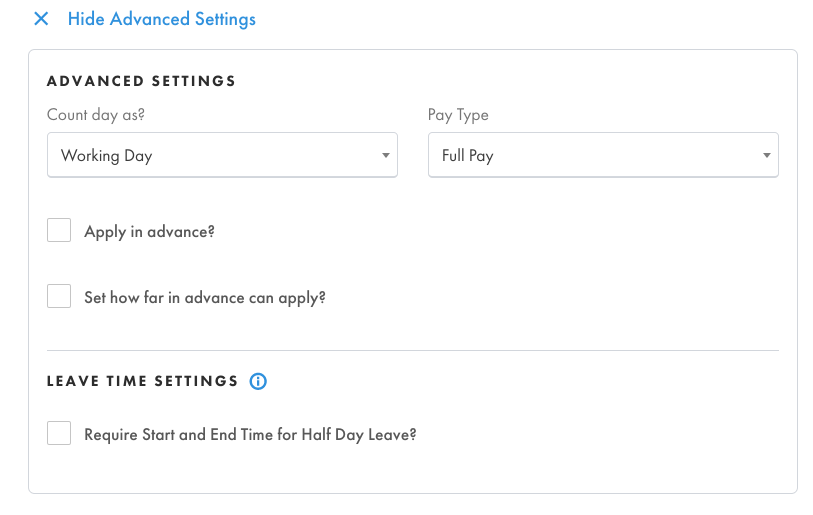
- Entitlement refresh — Annually on a selected date, Per Transaction, Annually on the employee's Work Anniversary, or No Refresh
- Mandatory consecutive leave — whether employees can apply one day at a time, or must apply their full entitlement at once (e.g. Maternity Leave)
- Allow Half Day
- Different entitlement for different employees (see below)
- Allow leave applications to exceed balance by drawing from another leave policy's entitlement — make sure employees are eligible for that subsequent policy before enabling this
5.2 Configuring different entitlement for different employees
To vary entitlement by employee criteria (e.g. years of service):
- Under Same Entitlement for all?, select No
- Choose a criteria — e.g. Years of Service
- Define the years-of-service ranges (e.g. 0–2, 2–5, 5–10, 10–99 years)
- Set the entitlement (in days) for each range
Example: Employees start with 10 days/year. After 2 years of service, entitlement increases to 15 days/year. If an employee reaches their 2nd work anniversary in June, altHR pro-rates the entitlement for that transition year:
(10 days / 12 months × 5 months) + (15 days / 12 months × 7 months) = 12.9 days
The following year, they receive the full 15 days.
6. Set Approval Routing (Section 4)
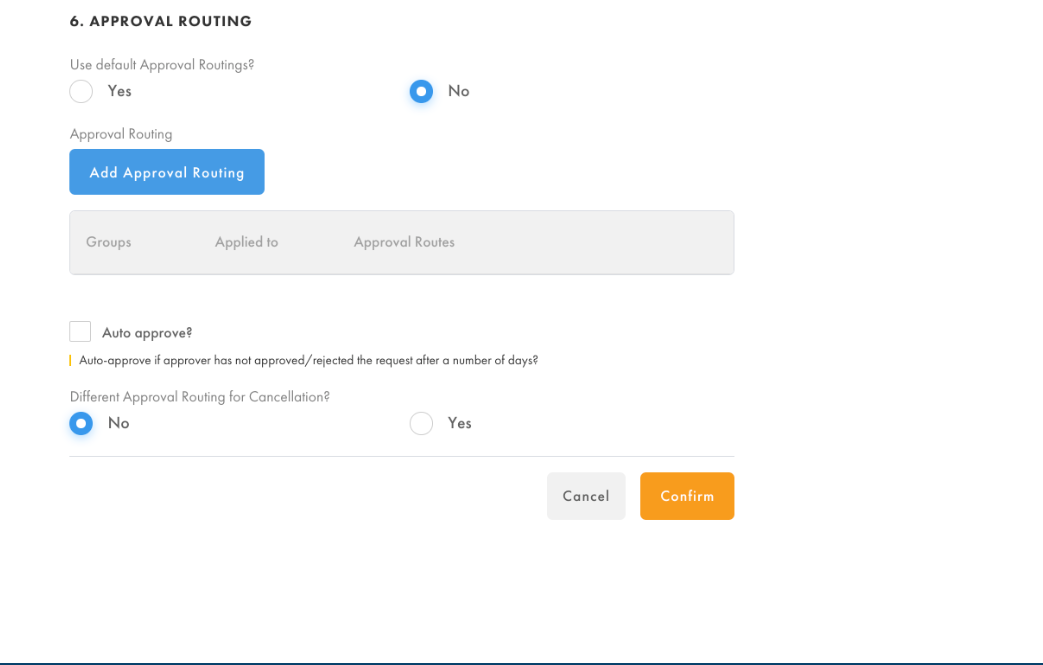
- Select Yes to use the default approval routing set in Leaves > Settings
- Select No to set a specific routing: click Add Approval Routing, choose the employee Group, select the Approval Routes, then click Confirm. Repeat to add routing for multiple groups
- Important: Always add an ALL entry (Group = ALL, Applied to = ALL) as a catch-all to avoid routing errors for employees not covered by a specific group
- Optionally tick Auto Approve? to auto-approve a request if the approver hasn't responded within a set number of days
- Under Different Approval Routing for Cancellation?, select Yes to set a separate approval routing for leave cancellation requests, or No to reuse the same routing
Click Confirm to save the policy.
7. Activate the Policy
- Go to Leaves > Policies
- Find your new policy in the list and, under Status, toggle it ON
- Click OK to confirm
Once activated, employees will be able to view and submit leave requests under this policy.
Verify It Worked
- The policy appears in Leaves > Policies with Status toggled on (green)
- An eligible employee can see and apply for the leave type in their altHR app
Common Issues
- Policy not visible to an employee: Check the Eligibility criteria (Section 2) — the employee may not match the selected criteria (e.g. wrong contract type)
- Entitlement looks wrong after a work anniversary: This is expected if entitlement varies by Years of Service — altHR pro-rates entitlement in the transition year (see the worked example above)
- Leave request stuck with no approver: Check that an ALL entry exists in the Approval Routing, and that the employee has a line manager assigned if routing depends on reporting line
Related Articles
- Approval Routings in altHR
- How to Set Up Special Leave Policy
- How to Set Up Maternity Leave Policy (In the making...)
Was this article helpful?
That’s Great!
Thank you for your feedback
Sorry! We couldn't be helpful
Thank you for your feedback
Feedback sent
We appreciate your effort and will try to fix the article